Working from home has never been more top of mind or possible than the present. And with more and more companies making it possible for their employees to work from their homes, and people making this change, it’s pretty clear that how we work is changing which means that how we use our homes is also changing.
To work from home effectively, you need to carve out separate space for this. It’s too easy to get distracted, feel cramped, and blur the lines between work life and home life. Getting a bigger house, condo or apartment is not a realistic solution for the vast majority either of people who work from home, which means that to get more space, you need to maximize your current space at home.
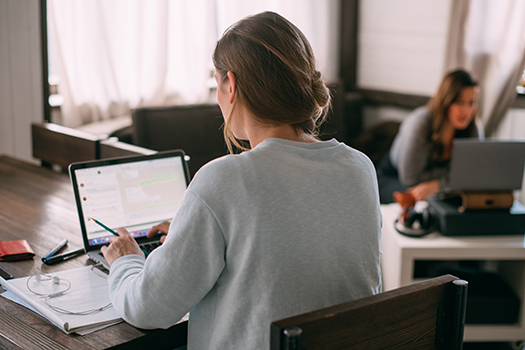
Step 1: Create A Space at Home
Homes come in all shapes and sizes. Based on your home, you may be able to re-purpose your spare bedroom, take back your attic or basement or even create a small space in your kitchen, living room or bedroom that is private. Whatever space you choose to claim as your work space, you need to become much more organized than you are now (and this is not an insult to those who are super organized either), and that means moving seasonal items and longer term items that you don’t need or use on a daily basis out of those spaces. The most cost effective and flexible place to put them is a self-storage unit.
We speak from experience too. When COVID-19 first hit Ontario, we dutifully followed the stay at home orders, only to realize our home makes us crazy. Our attic was filled to the brim with kids’ stuff, furniture (that will fit great in our “forever home” whenever that happens), Christmas décor, and even sports equipment. What did we do? We ordered a lot of shelving from Amazon, put it together at our storage unit, and started to get organized there. What do we have now? An entire floor of our house that we can work in (and our sanity too).
Step 2: Buy a Labeler
Ok, we fudged the above a little bit, because what we did first was ship everything over to our storage locker. And it kind of looked like a dump and we couldn’t find anything, especially a much-needed bike.
So, we decided to spend a day getting organized, putting together shelving, and the best thing we did was bring our labeler to label everything.
Now, we know where things are, and even better, we can describe where things are in the storage unit, so if our cousins need a bike, we don’t have to make a separate trip, we can let them go and pick it up for themselves. It really does feel good to be organized.
Step 3: Make a Schedule
This is less obvious, but because we moved ALL of our seasonal items and sports gear into storage, we thought it would be a good idea to set recurring reminders in our calendar to pick up certain items. So far, it’s worked really well. For example, Halloween is always on October 31, so it’s pretty obvious that we should stop at our storage unit around October 15, pick up the nicely labelled bin called “Halloween” (courteous of step 2) and bring it home. At the same time, we have a reminder set to bring our summer wreaths to the storage unit, so every time we go, we are bringing something and then taking something away. So far, so good – our attic continues to serve as our workspace, and stuff is not piling up in other rooms of our home.
Step 4: Store Files
We try to be as paperless as possible, but we still have paper files for the really important stuff. The good news is that banker’s boxes and plastic bins are still relatively inexpensive, so we’ve been packing up what we don’t need right now, and keeping these files in storage. Again, for example, our annual taxes. No one likes their taxes, but they need to be done and held onto for 7 years. We keep our past years in storage and set a reminder (step 4 really works) to pick up the past years tax file when it’s time to sit down and file again.
Step 5: Store IT Gear
Anyone who works from home knows that they are their own IT department. It’s been a real experience and we’re grateful for Google (especially the really smart techy people who share great tips, and advice online).
We’ve learned is that it’s nice to have some extra IT gear, rather than wait, and wait, and wait, for the delivery guy when you’re in a pinch. We have a plastic bin full of extra cords, back-up mouse and keyboard, an old printer that still works (but isn’t as great as the new one), our old iphone (you really need this when you drop your current one – speaking from experience!), and chargers. This plastic bin has saved us a few times now, and we’re not looking back. And yes, in case you were wondering – it is labelled “IT Gear”.
Step 6: Take a Picture
We tell all of our self-storage customers all the time to take a picture of their unit’s contents when they leave. This picture acts as a solid visual record of what’s in there, and where everything is.
If you have questions about self-storage and sharing a unit, contact us! We have lots of tips, advice and knowledge on self-storage so make sure to check out our blog, and to like or follow us on Instagram, Facebook & Twitter. You can also tour our storage facilities to see different unit sizes on YouTube if you’re curious what our Milton self storage or Woodstock self storage locations or individual self-storage units for rent look like.
Good luck working from home!
Your friend in self-storage,
Storage Solutions


